
Entering Goals and Objectives
DASH by Relay - Entering Goals and Objectives
Providers may manually enter goals and objectives for repeated use.
- Open the Student Information page of the desired student. The student information page can be accessed by clicking directly on the name of a student appearing on “My Caseload”. Alternatively, find the student and click the caret drop down next to the log service button.

- Locate the Goals & Objectives section in the middle of the page.

- Click “+ Add Goal”. A pop up will appear.
- Troubleshooting tip: If the "+Add Goal" button does not appear, click to refresh your web browser and try again.

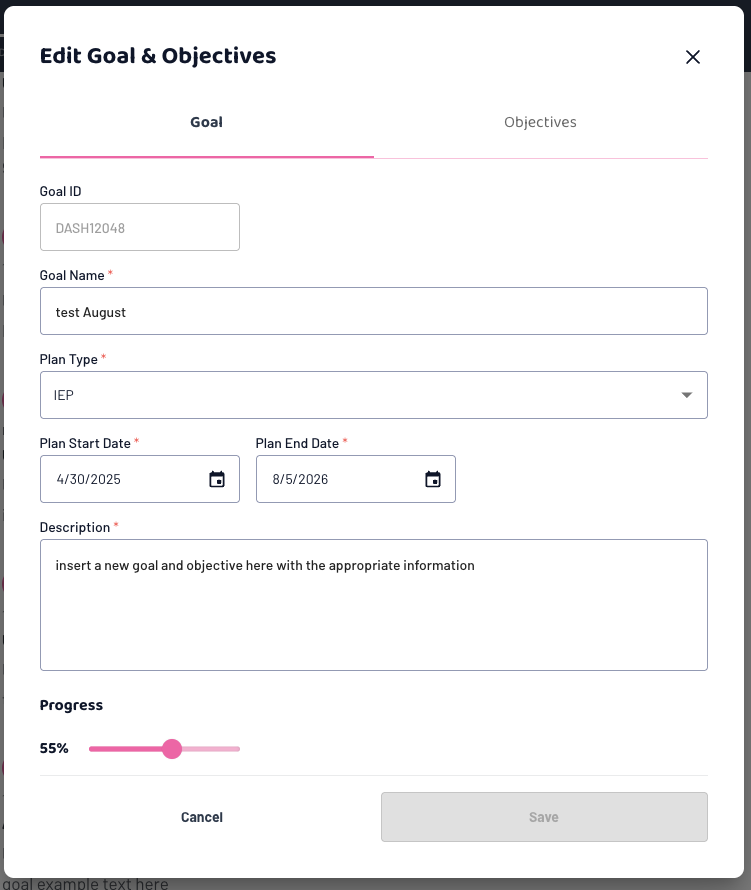
- Enter the goal.
- Goal ID – Up to 10 characters.
- Goal Name - Up to 50 characters.
- Plan Type – Defaults to IEP
- Plan start and end date
- Description
- Status
NOTE: All fields must be completed before the save button will activate
- Enter Objectives – Click on the Objectives tab of the goals pop up.

NOTE: Objectives are not required. You may enter if needed.
- Click “+ Add Objective”

- Enter the first objective.
- Objective Name
- Objective Description
You may enter additional objectives by click “+ Add Objective”.
- Click Save

Editing a Goal
- Click on the pencil icon located in the top right corner of the goal. This will open the goal and objectives.
- Troubleshooting tip: If the pencil icon does not appear, click to refresh your web browser and try again.

- Make edits as needed.
-
Click save. The save button will activate after an edit has been made.

Goals cannot be deleted. If you need a goal removed from view, contact Greenbush at medicaid.billing@greenbush.org.
Goals greater than two years old will automatically filter from view on the Student Information Page to keep your view clean and simple.
When logging a service, goals outside of the service date range will automatically filter from view to keep your view clean and simple.
